


If you’re looking for an alternative to WordPress that won’t require you to install a lot of plugins to function properly, BlogHandy can be an answer to what you need!
You don’t need a control panel like cPanel for WordPress. All you need is just to sign up for a new account on BlogHandy, and you can easily take care of the back-end on your website at your fingertip.
In this post, we will review BlogHandy as a content management system and how it can help you easily create a seamless blogging integration to your website.
BlogHandy as WordPress Alternative
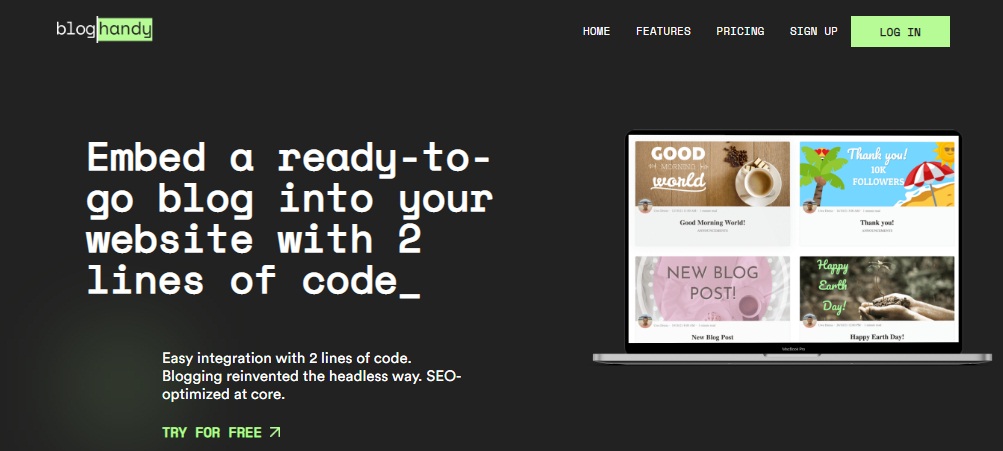
Just like WordPress, but simplified. That might be one good sentence to describe what BlogHandy is.
No coding skill is required, as BlogHandy will generate two lines of code that you can easily embed on your existing website. And on top of that, you can integrate it with any website or e-commerce builder like Weebly or Shopify.
As a content management system, not only does BlogHandy enable website owners to embed a ready-to-go blog into their website, but it also comes with additional features that can boost their online existence through SEO and social media sharing features.
Unlike WordPress that comes with myriads of plugins that you need to install, BlogHandy comes with some essential ready-to-use features that you can implement quickly for your blog.
Why You Should Choose BlogHandy As A Content Management System
Apart from being a simple way to integrate a blog into your website, BlogHandy also has some advantages compared to similar platforms.
#1 BlogHandy is user-friendly
While there’s a steep learning curve to get used to WordPress, BlogHandy comes with a user-friendly interface that is suitable even for your non-techie team members.
#2 BlogHandy has a streamlined process to integrate into your website
Simply by adding a 2-line code to your existing website, BlogHandy integrates seamlessly for your blog page. In addition to that, it saves your money and energy to hire a web developer or designer to adjust your blog pages with your website theme.
BlogHandy will automatically inherit the CSS style from your existing website, so you no longer have to design your blog section from scratch.
More importantly, BlogHandy is versatile as it works with any website builder or e-commerce platform. So, whether you create your website on Wix or Webflow, you can still implement BlogHandy in no time!
#3 No additional plugin required
While choosing and installing plugins on WordPress can be an advantage for some users, it can also be confusing if you’re a newbie who barely has time to learn which plugin works best for your website. And that’s how BlogHandy makes it easy for you!
BlogHandy comes with SEO and social sharing tools so that you can optimize your website and content in one platform without having to install anything else.
Nevertheless, BlogHandy is an all-in-one platform where you can create a blog post, set up the keyword, and add a meta description for your content without having to subscribe to premium SEO tools like Yoast or Rank Math. Isn’t that convenient?
#4 BlogHandy is budget-friendly
Starting only from $19 per month, BlogHandy also offers a 14-day trial to get used to the platform. It also comes with an option to upgrade or downgrade your plan anytime.
With its additional feature, BlogHandy is not just an alternative to WordPress. Beyond that, it is also an alternative to Yoast or Rank Math for SEO optimization tools, ShareThis or Shareaholic for social media sharing plugins, and Disqus for comment management on your blog page.
How To Create A Blog Post on BlogHandy
Since blogging is an integral part of BlogHandy functions as a platform, we will outline the tutorial to create a blog post on BlogHandy and how you can use their SEO and social media sharing features.
So, how can we optimize a blog post on BlogHandy?
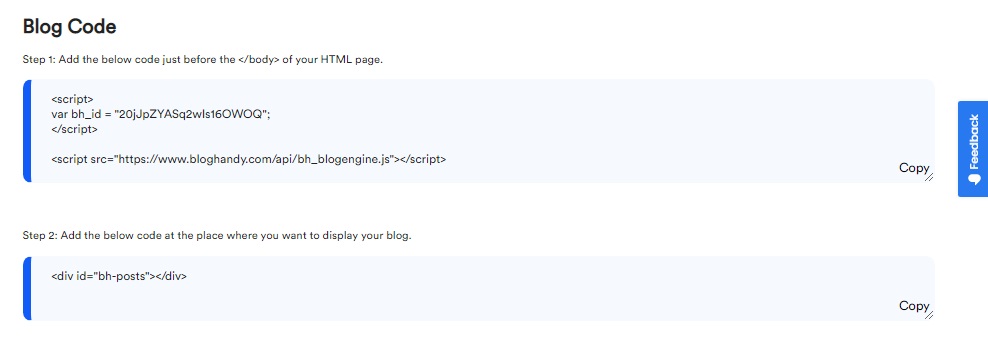
Step 1 – Insert the code on the HTML page on your website
Once you sign up to BlogHandy, you will be directed to the “Getting Started” page. This is where you can find the code to add to the HTML page on your website.
Copy each code and paste it according to the instruction on the page.
The first code should be placed before the </body> on your HTML page, and you can insert the second code depending on where you want to display it on your blog.
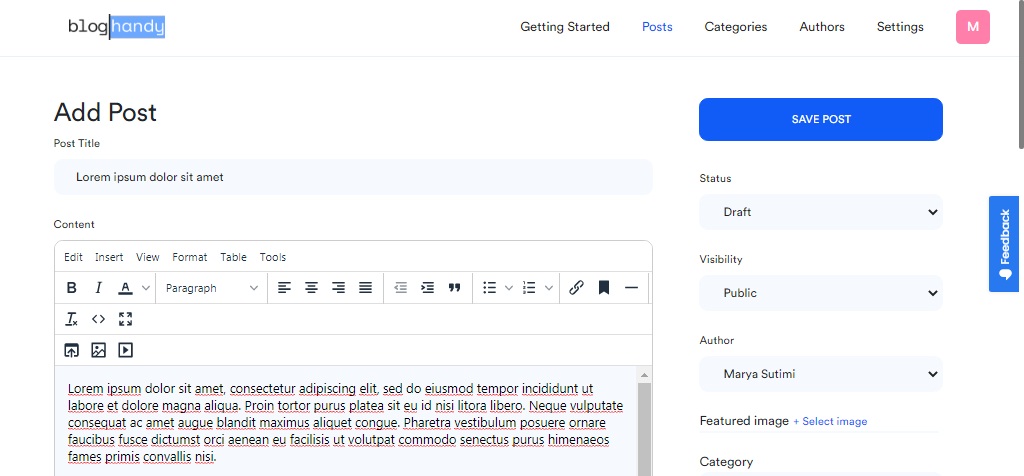
Step 2 – Go to the “Posts” section and click “Add post” button to start working on a new blog post
After you click the “Add post” option, you will be directed to the new blog post section, and this is where the magic happens.
The page has three sections, including the blog post, SEO Analysis, and Ranking/Statistic.
The blog post section is where you can start writing your content, including the title of your post. The layout is similar to the Classic Editor on WordPress, in which you can easily upload images and media accordingly.
After finishing your blog post, you can add your targeted keyword as well as the meta description in the SEO Analysis section. You can implement some keyword research methods to better rank your competitor’s website.
In the last section on Ranking/Statistic, you can find some suggestions to improve your blog post and how you can implement them for better ranking.
Step 3 – Set up the publishing status and add the additional details to your blog post
Based on your content calendar, you can set the blog post status as a draft, in review, scheduled or published. You can also select the publishing date for your post and set the visibility of your post accordingly. The latter will enable you to create a private blog post too.
In addition to that, you can also upload a featured image to your blog post. Setting a featured image for your blog post is essential to boost the engagement of potential readers through social media.
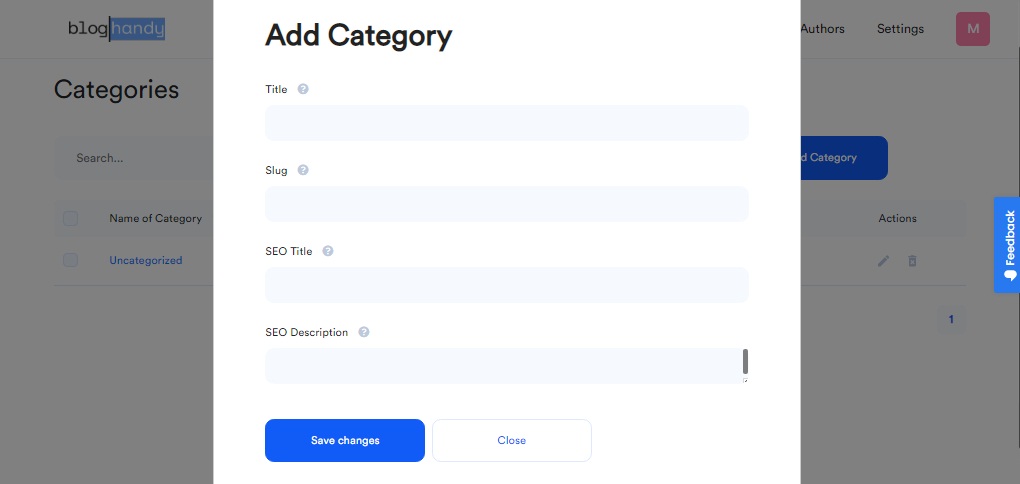
Step 4 – Add Categories and customize the URL
Setting up categories for your blog is often forgotten, but it can be a game-changer for your blog visitors’ experience.
Blog categories help you organize your site and allow your visitors to find the relevant information they look for on your blog. Categories make your blog easier to navigate, and the feature also compiles the relevant content that may interest your blog visitors. On BlogHandy, you can add the relevant categories for your blog to the “Categories” section.
When you do it right, you may even improve the bounce rate of your blog. Bounce rate matters as it showcases how efficient and well-targeted your blog posts are and how engaging your readers are with your content.
Last but not least, customize your blog post URL to make your blog post more SEO-friendly.
Once everything is set, click the “Save Post” button on the upper right side of the page to schedule or publish your blog post.
How to Add Categories For Your Blog on BlogHandy
Adding categories to your blog can benefit you big time, as it helps you organize your blog while at the same time it is also a plus point for search engine optimization.
Having categories on your blog page helps search engines and the visitors of your website identify the hierarchy and contextual content that you write there.
On the main menu of BlogHandy, you can find the Categories section where you can add a new category for your blog posts.
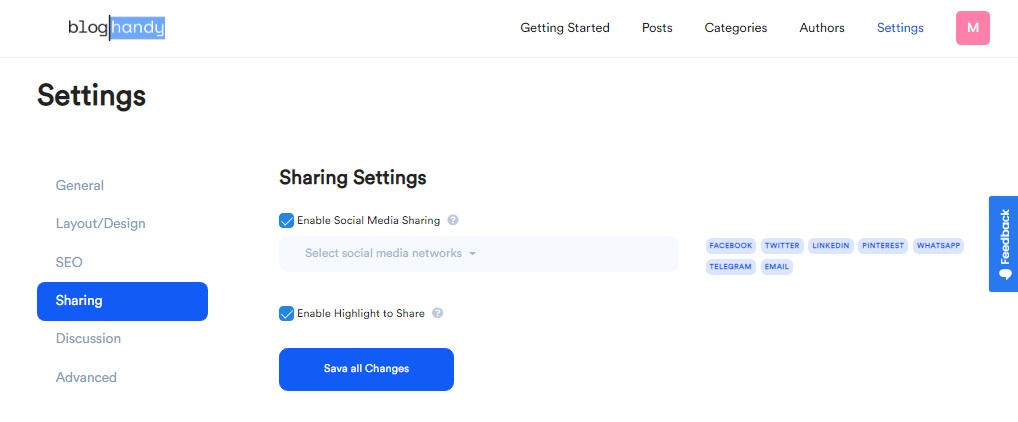
How to Enable Social Sharing Tools on BlogHandy
Social media is not only a great way to build an active following, it is also one of the most effective tools to drive traffic to your website. And that’s why having a social sharing button on your blog post can benefit your website in general!
On BlogHandy, you can set up a social media sharing button on your blog post with a few clicks.
Coding or plugin is not necessary, all you need is to go to the Setting section on your BlogHandy page, and click the Sharing button where you can check the option to enable social media sharing for your blog post.
Currently, BlogHandy allows you to set the sharing tools for several social media platforms, including Facebook, LinkedIn and Pinterest.
Conclusion: BlogHandy as a Content Management System
BlogHandy comes as an alternative to WordPress with a straightforward process and enables users to integrate it with various website and e-commerce builders.
The clean interface on BlogHandy is also suitable for non-techie users with a relatively easy user experience. However, despite being user-friendly, BlogHandy still offers some highly functional features that benefit your website. It is equipped with an internal SEO optimization tool and a social media sharing enabler.
As a content management system, BlogHandy is simple yet complete. The upgrade option also allows you to add more authors and enable you to work on the platform as a team.
If you are looking for something simple as a back-end management system with all the necessary tools for your blog, BlogHandy is definitely worth a try!


